Guide to Vaccine Sign-Up
- People who want to sign up for a vaccine appointment can visit Vaccine Administration Management System (VAMS) on the Center for Disease Control and Prevention’s website in order to look at available dates and times.
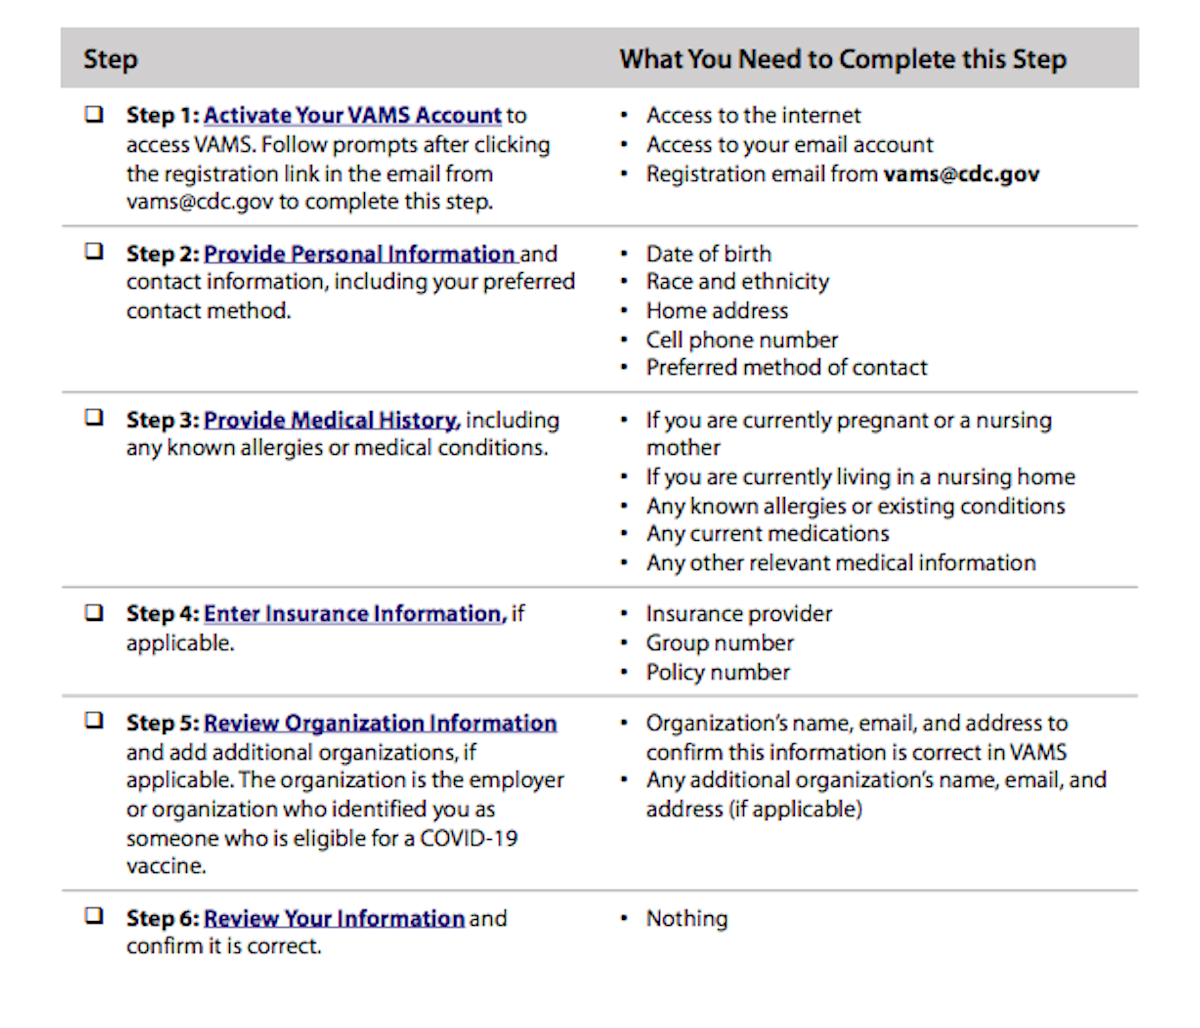
- First you need to create and activate your account, and then search for a clinic near you; from there you can select the date and time of your appointment and you’ll receive a confirmation code.
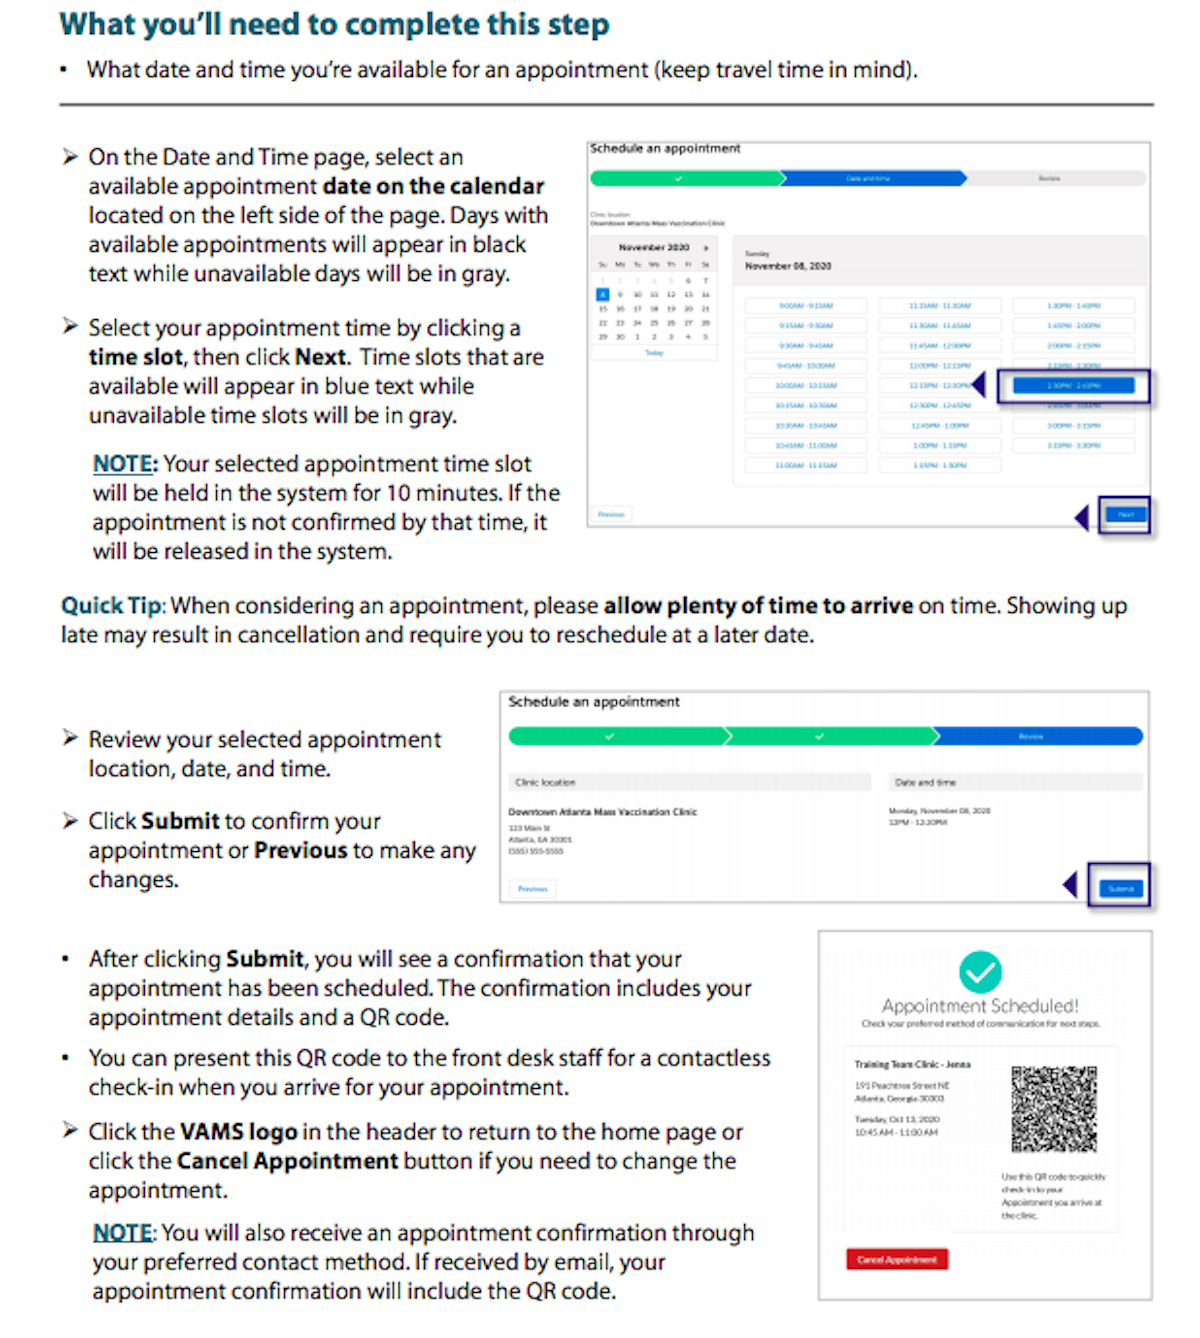
- Make sure to get to your appointment early; slots will only be held for 10 minutes after the scheduled appointment.
So far, the Food and Drug Administration (FDA) has approved two separate vaccines to prevent COVID-19: Phizer’s and Moderna’s. The vaccine has been administered in rounds, first for first-responders and healthcare workers, and now the public is able to sign up for their own appointment.
- To register for the vaccine, there is an online application available through the Vaccine Administration Management System (VAMS) on the Center for Disease Control and Prevention’s website.
Steps for Signing Up Online
- Create and activate your VAMS account
- After you’ve signed up for VAMS and have activated your account, there’s some information you’ll need to provide. This includes your personal/contact information, medical history, insurance information, and your organization/employment affiliation.

- Schedule your vaccination appointment
- Once your account is activated, you can go to the home page to see a tab labeled “my appointments” and click on the “schedule appointment” button. That’ll direct you to the clinic location page, and once you plug in your zip code, you will be able to find clinics offering vaccination appointments near you. PRO TIP: filter results by 5, 10, or 20 miles away to get clinics closest to you. Once you see the clinic you prefer, click on it and then click the “next” button.
- Once you click “next,” a calendar will appear. Click on the ideal day of your appointment and from there a chart will pop up showing available times during the day in blue (non-available times are in grey). Click on the time, and then click “next.”
- Once you click “next,” click the submit button at the bottom of the screen. From there, you’ll receive a code that you can present at the appointment.
If you ever need to reschedule your appointment, click “cancel appointment” on the page with your code. Only one appointment can be made at a time. Pro tip: make sure to get to your appointment early.

- At the date and time of your appointment, present your appointment code to the front desk of the hospital/clinic. From there, get vaccinated!
Learn more about SurvivorNet's rigorous medical review process.


